
CONCEPT
Today I was working in Blender and wanted to create a hand puppet. Yes, I was inspired by Draxtor who can be seen in Sansar with his hand puppet. So I made one for myself and I thought I should put it out on the Sansar Store for others to enjoy.
For those of you who are 3D artists with years of experience, you might look at this entire post and mutter something like: “That was too easy.” And then you might go on to say to yourselves: “All he did was take someone elses mesh model of Susanne in Blender and give it a material with a solid color, export it, import it, and take a photo of it for the Sansar Store. There was no creativity there. No, there wasn’t. All of what you are about to read here is about the the nuts and bolts, the mechanics if you will, of what it takes to imports and market an attachment for your avatar in Sansar.
The Long Road After Creation
Yes, for those of you who have made attachments for an avatar to be used in Sansar and also to be sold on the Sansar Store, you all know there are many steps to getting your model ready as an attachment. I am writing this blog page for myself and you. It is a reminder of the long road we must travel again and again.
From the Point That My Model Was Ready
Susanne was finished in terms of modeling when I brought her into Blender. I didn’t really change anything about her other than to give her a specific size. I most often do sizing in Object Mode. From hearing other creators talk about using Blender, I think I do more work in Object Mode than most creators. And you may do your sizing in Edit Mode if you are more comfortable working that way.
Susanne needed to have a simple material that was nothing but a green color. This material does not even have a texture attached to it. Just a colored material. To prepare Susanne to receive the material, the entire mesh object had to be unwrapped. This creates the UV map. Then I had to create and apply the material. I am far enough along now to save the Blender file with a simple name like Susanne. But I am about to make another model from this one, so this Blender file will be named “Susanne for Photos” because in Sansar we need two photos of this attachment. One photo is for the Sansar Store, and the second photo is for the thumbnail that you will see in Lookbook. They can be the same photo, but you might want the thumbnail to be cropped tighter than the photo you use for the store. For Susanne the hand puppet, I used only one photo in both places.
Two Models of the puppet? Why?
To take photos in Sansar of the model, it is most often easier to import the model as the plain ordinary objects that is large enough to photograph. And the object must be imported into our inventory, not into the Lookbook. So, I save the file as it is now and then export it as an FBX that will be imported to my inventory in Sansar. This model is just to take photos.
Preparing the Attachment for Your Hand
While working in Blender, you must make the attachment the correct size to correspond to your avatar. This is because scaling this attachment in Sansar will change its size and that will change the position of the attachment in relation to your avatar’s hand. All control over the attachment’s location on your avatar is accomplished in Blender, not in Sansar.
I have never made clothing for an avatar so my attachments have no rigging. I have only made simply static objects that I attach to my hand, or place on my head. When I created my architects scale, that was an easy project because I made it exactly 12-3/4″ long. 12″ for the measuring scale and 3/8″ on each end extra, because that is how they are made in real life. But to make a hand puppet, you just make it look about the right size for your avatar and it must cover your entire hand. I don’t have a hand puppet in real life to measure. So, I just used my eye to tell me it looked about right. All this is done in Blender.

Next, I had to place the puppet over the hand of my sample avatar that I imported into Blender. I rotated it to look right and then moved the origin of the puppet to the center of the building grid. This is done so that the puppet’s origin matches the avatars origin when it gets imported into Sansar. I checked that the puppet was large enough to cover all of my avatar’s fingers. I set the rotation to 0,0,0. I set the scale to 1. In Blender those steps are called “Apply Rotation and Scale.”
Now I am ready to export this puppet from Blender as an FBX file. The export goes pretty smoothly now that I have learned what settings are required.
And next I go into Sansar to import these two models. Remember that one model is the object that must be photographed for the store listing and thumbnail. And one model is the attachment that is uploaded into the Lookbook.
Why Photography First?
The first model is created as an import into your inventory for photography. The photo that you use for the thumbnail must be ready before you bring the attachment into the Lookbook because there is no second chance to add the thumbnail or change the thumbnail later.
Stay Tuned for Part 2
In Part 2 of this series, we will take the photos, and store them for future use on your hard drive. Then we will import the attachment to your Lookbook and list it on the Sansar Store.


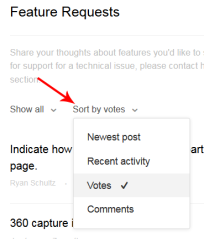
 Here is a link to the first survey of Feature Requests for Sansar creators. In this survey I will begin by gathering information about the various categories that should be separate. This survey on the topic of Sansar Feature Requests is the individual effort of Ethos Erlanger.
 I had the opportunity today to review what was said by
  The hills in life are the high points and the valleys are the low points. This is also true in a virtual world.

You must be logged in to post a comment.